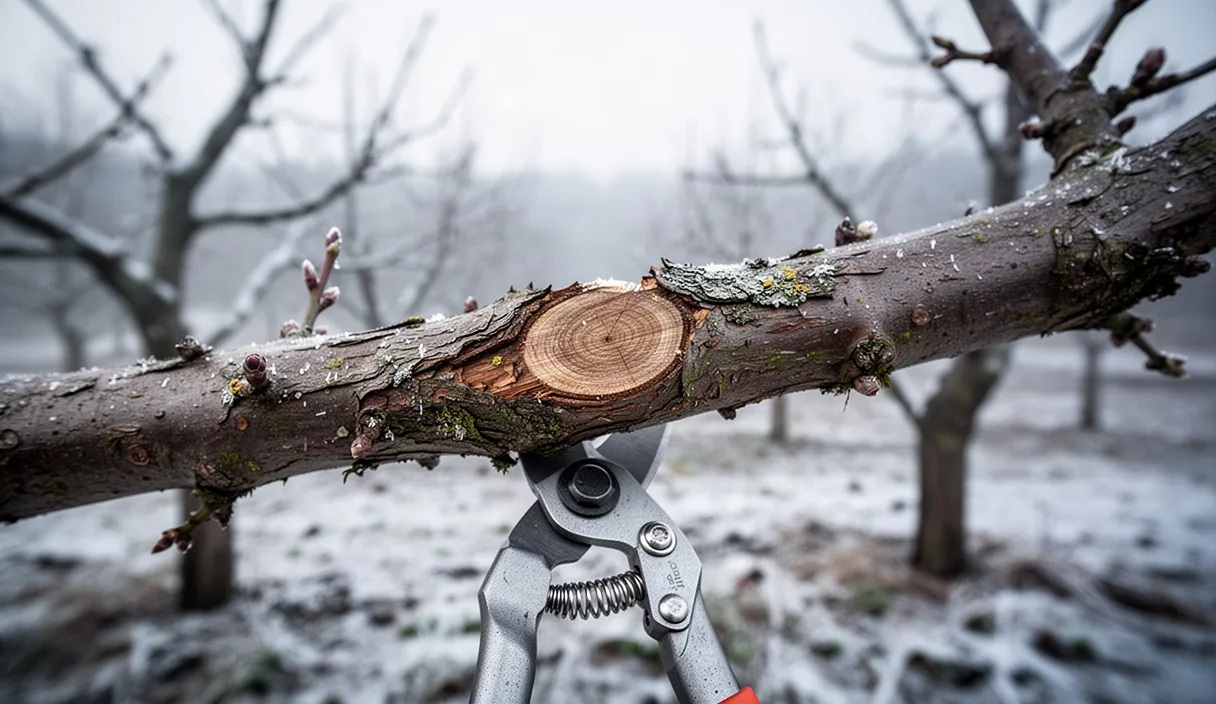
You will separate spent floricanes from emerging primocanes to ensure steady berry yields season after season. Prune old wood flush with the soil to improve light distribution across new foliage.
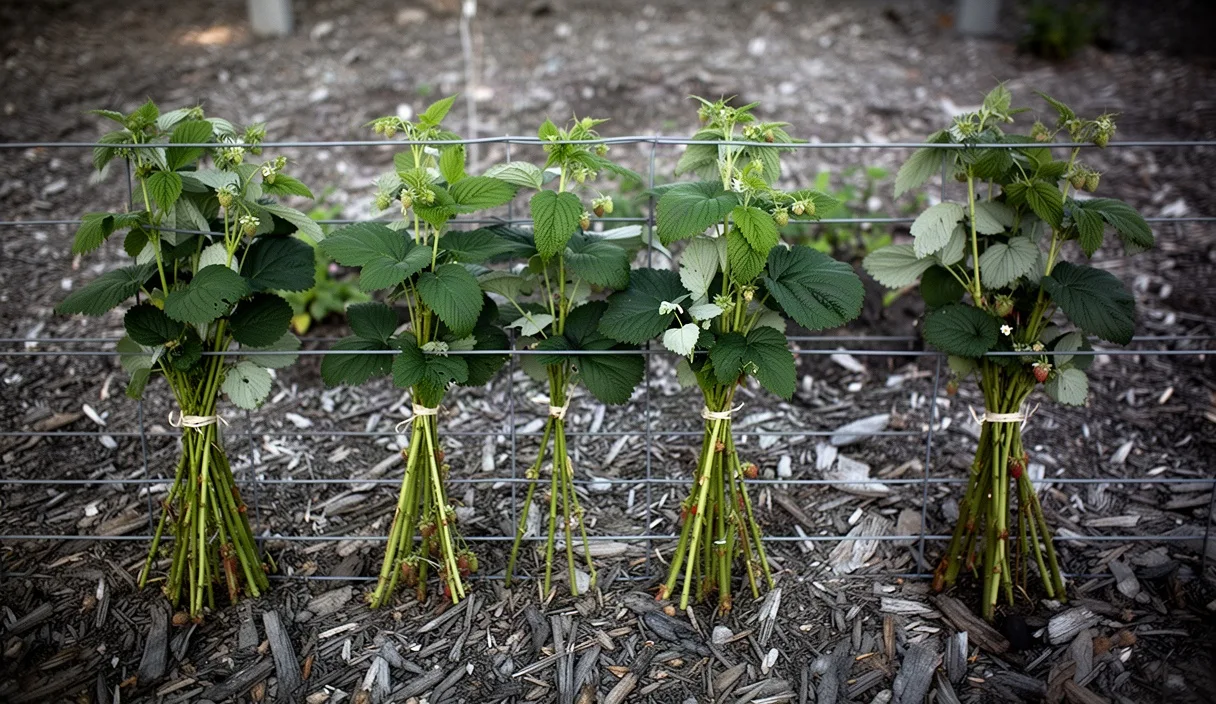

- Cut dead, dry floricanes down to crown level immediately after summer harvest concludes.
- Thin new vegetative canes to twelve strong stems per linear meter of row trellis.
- Secure remaining primocanes to wire supports to protect them from winter wind whipping.
Summer-bearing raspberries, or floricane varieties, produce fruit strictly on wood that developed during the previous growing season. Managing these plantings demands an orderly routine because two distinct generations of vegetative canes share the exact same root system from spring through autumn. Neglecting this dynamic leads to overcrowded hedgerows, fungal outbreaks, undersized berries, and declining yields within three years of establishment.
Second-year management centers on the crucial period immediately following the summer harvest. Once the bearing canes yield their final fruit, their biological purpose ends. A grower who leaves these spent stalks in place invites disease and starves the developing young canes of light and root reserves. Clear, methodical pruning, thinning, and trellising allow you to direct the plant's resources into the vegetative shoots that will produce next season's crop.
Understanding the Biennial Cycle of Raspberry Canes
The root system of a raspberry plant is perennial, surviving for a decade or longer under sound cultural practices, but the aerial canes are strictly biennial. Each individual cane possesses a lifespan of roughly fourteen to sixteen months. Understanding this biological timetable dictates every cut you make with your pruners.
During a cane's first year of growth, it is known as a primocane. Primocanes emerge from the subterranean root crown or from adventitious root buds in early spring. These shoots focus entirely on vegetative extension, developing fleshy green stems, broad foliage, and overwintering buds in the leaf axils. In summer-bearing cultivars, these primocanes do not flower during their initial season. Instead, they store carbohydrates and form structural tissues until autumn cold induces winter dormancy.
In the subsequent spring, these overwintered stems break dormancy and transition into floricanes. Lateral fruiting branches emerge from the axillary buds, produce flowers, and set fruit between late June and early August, depending on your geographic region and cultivar. Once the floricane completes fruiting, its vascular system breaks down, senescence begins, and the cane dies back to the base. Simultaneously, a fresh flush of first-year primocanes surrounds these dying canes, competing directly for sunlight, water, and soil nutrients.
| Characteristic | Primocane (First Year) | Floricane (Second Year) |
|---|---|---|
| Stem Color | Bright green to pale red; succulent bark | Dull brown, gray, or woody; peeling bark |
| Foliage Quality | Vigorous, actively photosynthesizing | Chlorotic, yellowing, senescing post-harvest |
| Productive Role | Forms buds for the next crop season | Flowered and yielded current season berries |
| Post-Harvest Status | Must be preserved and secured | Non-functional; targeted for prompt removal |
Post-Harvest Identification of Spent Floricanes
Pruning requires immediate, confident differentiation between productive primocanes and spent floricanes. In dense plantings, canes interlock tightly, making visual assessment at eye level misleading. You must examine the stem structure from the mid-canopy down to the soil line.
Floricanes display distinct indicators of physical senescence within two weeks of their final berry drop. Their foliage begins to yellow, desiccate, and drop prematurely, leaving sparse clusters of leaves toward the terminals. Furthermore, floricanes retain the dried remnants of harvest: empty fruit receptacles, dried pedicels, and spent inflorescence branching along their upper lateral shoots. The outer epidermis of a floricane appears weathered and woody, often developing vertical fissures or shedding paper-thin strips of brown bark.
In contrast, current-season primocanes remain stout, flexible, and completely leafy from the upper canopy down to within 15 cm of the ground. They possess a uniform green or reddish hue with smooth bark, displaying no lateral fruit branch remnants. If you encounter an ambiguous cane, test its flexibility: floricanes feel brittle and crack when flexed, while primocanes yield without snapping.
- Check for lateral branches: Floricanes feature multiple short, woody fruiting spurs along the cane length.
- Inspect the epidermis: Look for dry, peeling, graying outer tissue rather than smooth, waxy green stems.
- Verify terminal growth: Primocanes exhibit an active apical growing tip, whereas floricane tips terminate in dried fruiting clusters.
Sanitary Removal Technique at the Crown Base
Do not wait for winter to excise spent floricanes. Cut them out immediately after the final harvest concludes in mid-to-late summer. Leaving dead wood in the hedgerow creates an incubator for cane blight (caused by the fungus Paraconiothyrium cordis-posthuma), spur blight (Didymella applanata), and anthracnose. These pathogens sporulate readily on dying tissue and spread to adjoining primocanes during late summer rain events.
Select a pair of sharp bypass pruners for stems up to 15 mm in diameter, or narrow-profile bypass loppers for thicker canes. Anvil pruners must be avoided because their crushing action splinters the crown tissue, creating jagged wounds that resist callus formation. Sterilize the blades before beginning work and between distinct cultivar blocks by wiping them with a 70% isopropyl alcohol solution or a 10% pine oil solution.
Cane removal requires precise blade placement. Trace the spent floricane down to the soil level and position the bypass blade flush against the basal crown. Sever the cane completely, leaving no stub. Stubs lingering 5 to 10 cm above the soil rot slowly, harboring fungal mycelium and insect larvae, such as the raspberry cane borer. Cut as low as possible without gouging the underground crown or severing adjoining primocanes.
Carefully extract the severed cane by sliding it downward and out from the trellis rather than yanking it upward through the canopy. Pulling upward tears the leaves and snaps the brittle tips of next year's primocanes. Carry all excised canes completely out of the field. Burn them if local regulations permit, or discard them in municipal green waste away from your planting beds. Do not chip them into local mulch or leave them in the row middles.
Thinning Primocane Density for Maximum Air Flow
Once you remove the spent floricanes, the row will still contain an excessive number of primocanes. An unmanaged raspberry stool can produce dozens of suckers per linear meter, creating a microclimate with high relative humidity and poor light penetration. You must aggressively thin these remaining first-year canes to maximize air movement and expose the basal leaves to sunlight.
Establish a target density of 12 to 15 strong canes per linear meter of row, or roughly 4 to 5 canes per linear foot. Maintain the base of the hedgerow within a distinct width of 35 to 45 cm. Any vegetative sucker that emerged in the walkway outside this boundary must be removed entirely, cutting it below the soil line with a sharp spade.
- Eliminate weak and undersized wood: Excise all primocanes that have a base diameter smaller than 8 mm (roughly the thickness of a standard pencil). These thin shoots lack the carbohydrate storage capacity to produce heavy, high-grade fruit.
- Cull damaged and deformed stems: Inspect the canes for asymmetrical swellings indicating crown gall or cane borer damage, and remove any stems showing dark purple or brown lesions near the lower nodes.
- Select for structural balance: Retain the thickest, tallest, and most upright primocanes. Ensure retained canes are spaced roughly 7 to 10 cm apart across the bed width rather than clumped in a single tight knot.
This aggressive thinning reduces the humidity levels within the hedgerow interior below the threshold required for Botrytis cinerea (gray mold) spore germination. It also ensures that systemic fungicides or organic biological sprays achieve thorough coverage on all remaining plant surfaces.
Tying Canes to Parallel Wire Trellis Systems
Raspberry canes lack tendrils, rootlets, or twining structures; they cannot support themselves when loaded with foliage and developing fruit. Without an engineered trellis, autumn winds whip the primocanes against each other, abrading the outer protective cuticle and breaking lateral buds. A parallel two-wire or T-trellis system provides the rigid architecture necessary to hold the canes secure.
Construct or maintain your support using high-tensile 12.5-gauge galvanized steel wire secured to heavy-duty end posts. Set the lower wire line at 75 to 80 cm above the ground to support the mid-cane section. Set the upper wire line at 130 to 140 cm to capture the upper reaches of the canes. In a parallel T-trellis or V-trellis configuration, sports nutrition hold parallel pairs of wires spaced 45 to 60 cm apart, allowing primocanes to be spread outward to capture solar radiation.
Fasten the thinned primocanes to the trellis wires using agricultural tie tape, flexible vinyl bands, or natural jute twine. Never use thin copper wire, unshielded twist ties, or nylon fishing line, which cut directly into the vascular cambium as the canes sway and expand in girth.
- Space the canes uniformly along the wire rather than bunching them together, leaving a consistent gap of 8 to 12 cm between adjacent stems.
- Apply each tie using a figure-eight configuration: wrap the material around the wire first, cross it over, and then encircle the cane loosely. This prevents the cane from rubbing directly against the abrasive metal surface.
- Allow 1 to 2 cm of slack within the loop so the cane stem can expand in diameter through late autumn without being girdled.
Organic Mulching Protocols to Suppress Weed Competition
Raspberry plants establish fibrous, adventitious root systems that remain concentrated within the top 25 cm of the soil profile. Consequently, they compete poorly against perennial grasses and broadleaf weeds, which siphon off moisture and nitrogen. Applying an intentional layer of organic mulch post-harvest preserves soil moisture, moderates soil temperature swings, and starves germinating weed seeds of light.
Apply coarse, carbon-dense mulches that resist compaction and maintain adequate gas exchange. Coarse wood chips, aged bark nuggets, or clean, seedless cereal straw (such as wheat or triticale) perform exceptionally well. Avoid fine sawdust, which forms an impermeable crust, and avoid unfinished compost, which may introduce opportunistic weed seeds and excessive late-season nitrogen.
Spread the mulch material across the entire 45 cm width of the hedgerow to a uniform depth of 7 to 10 cm. Crucially, do not pile mulch directly against the bases of the primocanes. Maintain a clean, mulch-free zone of 5 cm around the perimeter of every crown. Piling moist organic material directly against the cane collar creates an ideal environment for Phytophthora rubi (phytophthora root rot), especially in heavy clay soils during autumn rains.
Mulch breakdown consumes trace amounts of surface nitrogen through microbial action. Because raspberries enter dormancy in late autumn, do not counteract this immobilization with high-nitrogen synthetic fertilizers in late summer. Forcing late-season vegetative flushes makes the canes susceptible to early frost injury. Re-evaluate soil fertility through an accredited agricultural laboratory in late winter before making nutrient additions.
Common Mistakes in Second-Year Cane Care
Growers frequently undermine an otherwise sound berry planting through a few persistent errors during post-harvest maintenance:
- Delaying pruning until winter: Postponing floricane removal until the dormant season allows foliar diseases to migrate directly from infected old wood to young primocanes during the warm, wet months of late summer.
- Leaving high stubs at the crown: Cutting canes 10 cm above the soil line preserves an entry portal for fungal pathogens and wood-boring pests, which gradually work their way down into the healthy root crown.
- Failing to thin primocanes sufficiently: Retaining every healthy-looking vegetative shoot produces excessive shade next spring, forcing the lower fruiting laterals to abort and pushing production to the very tops of the canes.
- Over-fertilizing in late summer: Applying nitrogen fertilizers directly after harvest stimulates tender tip growth that fails to harden off before the first killing freeze, resulting in extensive tip dieback.
- Binding canes too tightly: Fastening stems firmly against trellis wires without allowing expansion space causes mechanical girdling as the cane adds caliper in late autumn.
Operational Next Steps for the Planting Bed
With spent floricanes removed, primocanes thinned, and structural supports secured, your management shifts toward winter hardening and system maintenance. Complete the following actions before cold weather sets in:
- Conduct a thorough clean-up: Walk the rows and rake up fallen leaves, detached bark, and severed wood pieces that escaped your initial collection buckets. Dispose of them off-site.
- Manage late-season irrigation: Reduce watering frequency to slow vegetative growth and prompt dormancy. However, do not allow the root zone to dry out completely. Apply a final deep watering of 25 to 30 mm immediately before the ground freezes solid in late autumn to protect the crown from desiccation during winter winds.
- Inspect trellis anchor lines: Verify that end-post anchors, wire strainers, and line tensioners can support the mass of winter snow and freezing rain without sagging.
- Send soil samples for testing: Sample soil to an 18 cm depth along the drip line to determine current phosphorus, potassium, and magnesium concentrations, as well as soil pH (target 6.0 to 6.5). If amendments or lime applications are needed, consult your regional extension office to interpret the report and schedule applications for early spring.
This guide serves educational purposes; consult your regional agricultural extension office for site-specific soil testing and plant health orders. Disclaimer